In today’s fast-paced digital world, staying connected with your customers is more important than ever. With the new Messenger Opt-In feature, ChatGenie now allows you to engage with your customers even beyond Facebook’s 24-hour messaging rule. This feature is a game-changer for businesses looking to maintain ongoing communication, build relationships, and drive sales long after the initial interaction.
What is the Messenger Opt-In Feature?
The Messenger Opt-In feature allows your customers to subscribe to ongoing updates, enabling you to send messages and promotions long after the 24-hour window has passed. By utilizing this feature, you can set up follow-up lists and deliver recurring notifications, ensuring your customers stay informed and engaged.
How Does it Benefit Your Business?
• Boost Customer Engagement: Keep your audience informed with regular updates and exclusive promotions.
• Long-Term Communication: The opt-in ensures you can send relevant messages beyond the initial contact.
• Compliant & Efficient: No need to worry about breaking Facebook’s messaging rules; this feature allows you to communicate with full compliance.
How to Get Started:
Setting up Messenger Opt-In is simple.

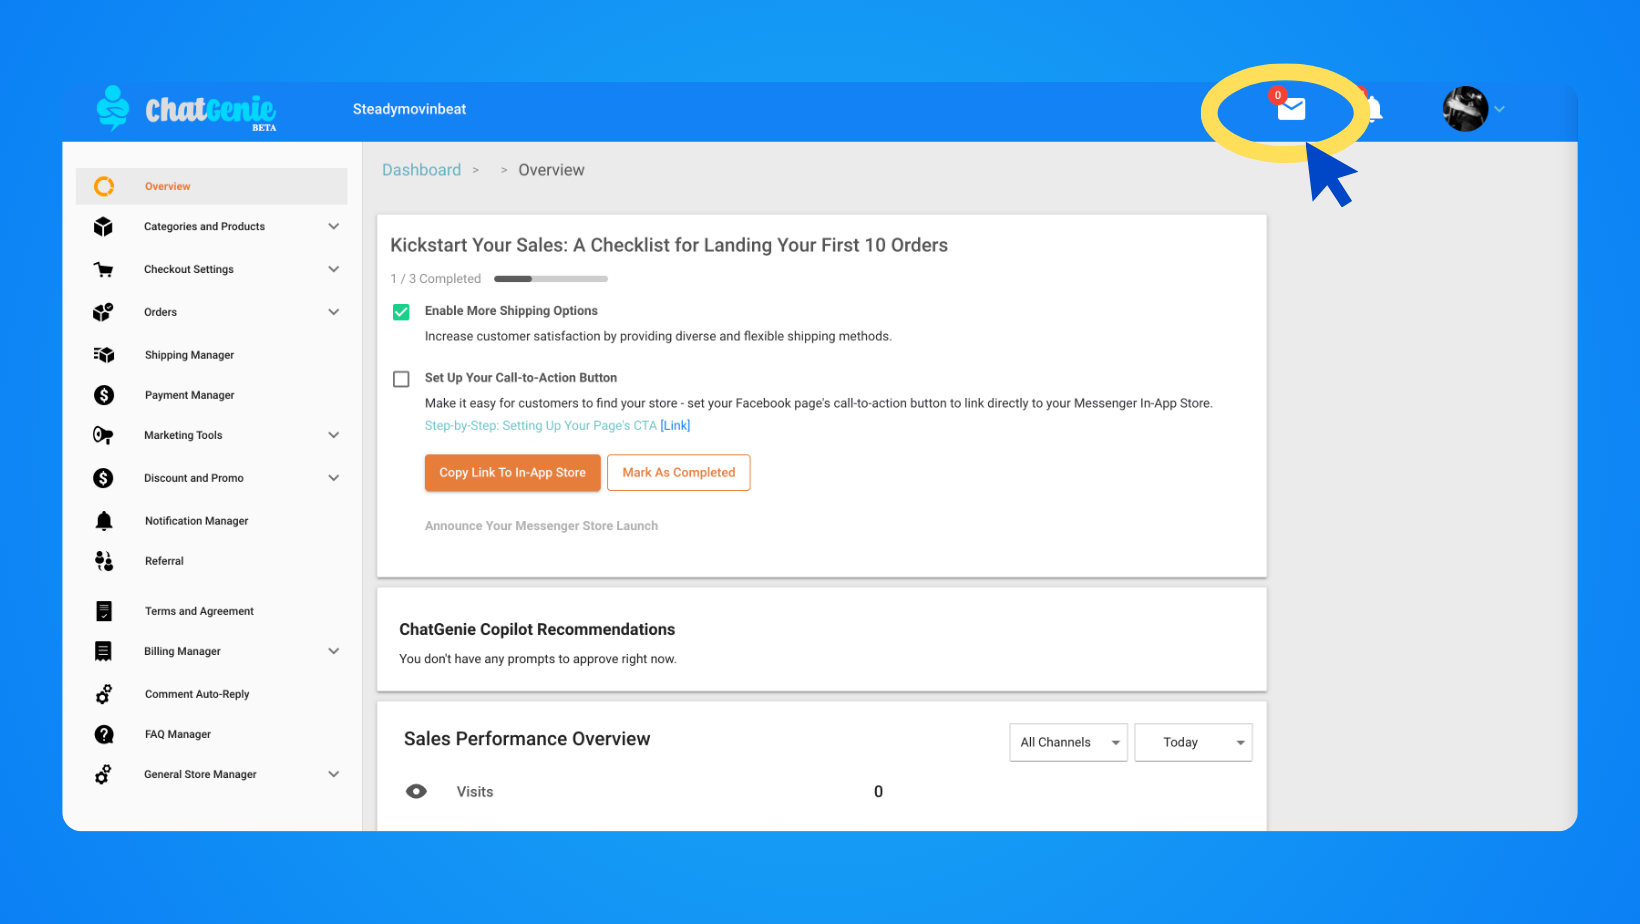
- Head over to your ChatGenie dashboard and click on the Message Inbox icon located at the top right.
.jpeg)
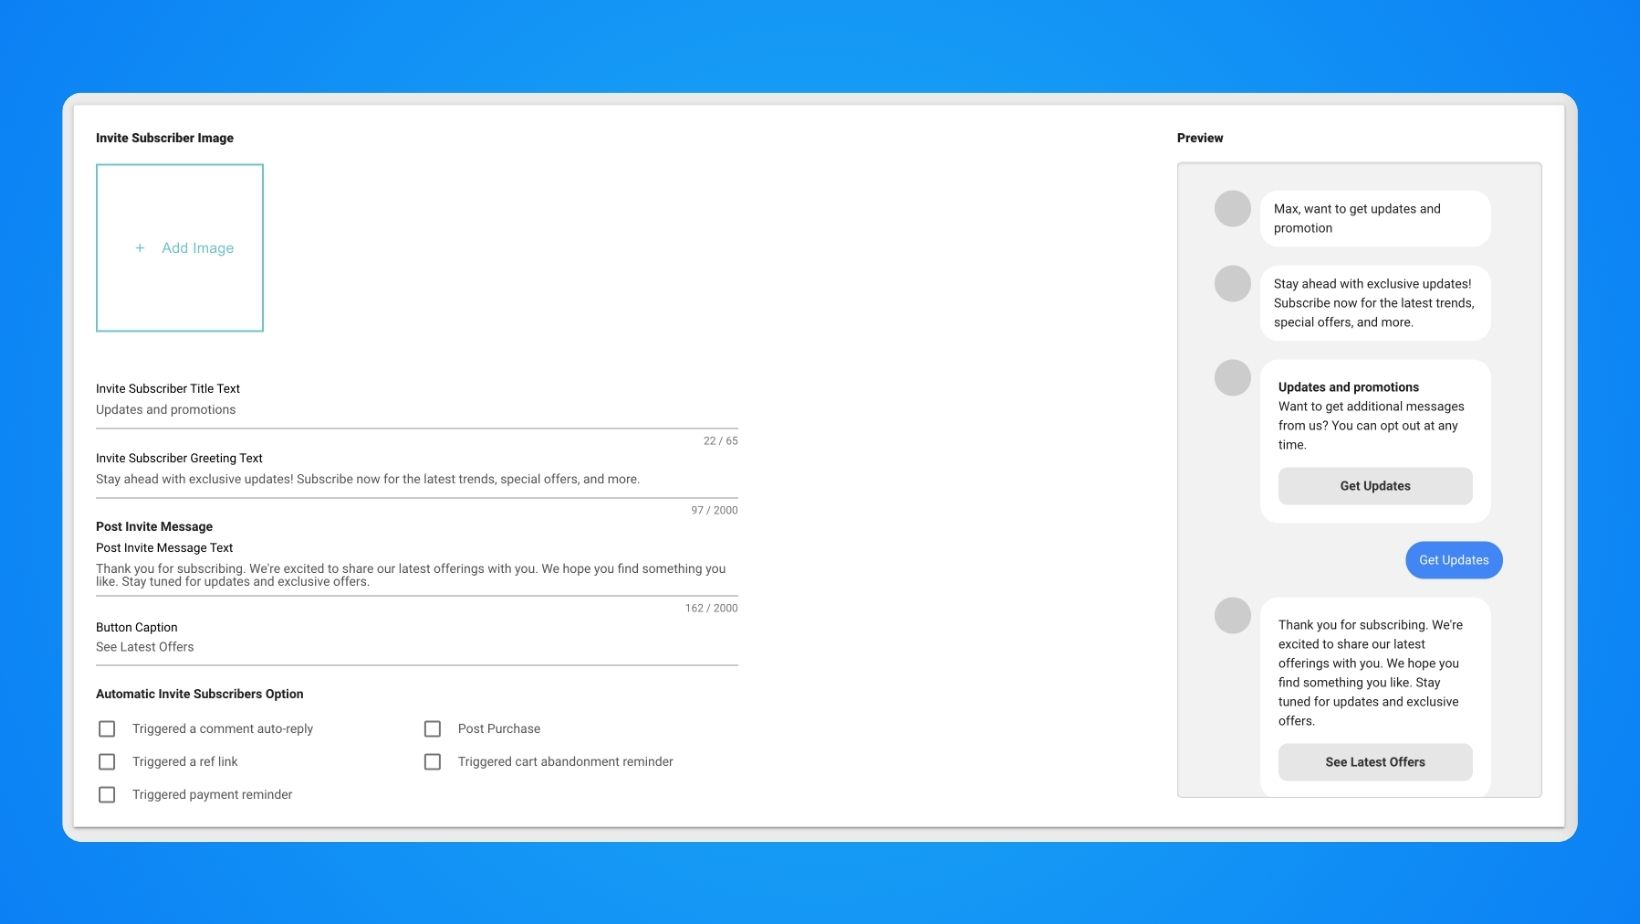
2. Click the Invite Subscribers button located at the top right corner.

3. Add an image (landscape format is preferred) that will show up with your invite.
4. Add a title for your invite message. You can type in a maximum of 65 characters but make it short and sweet.
5. Add an invite message text. This message should inform your users why they need to opt-in to receive messages from you. You can add a maximum of 2000 characters.
6. Add a post-invite message. Thank your customer for signing up and invite them to browse your shop.
7. Add a post-invite Button Caption like SHOP NOW or ORDER NOW.
8. Select the subscriber options that will trigger the invite. If you want to create a social media post asking users to subscribe, make sure to also choose ‘Triggered a ref link’.
9. Click the save button.
10. Type CONFIRM on the pop-up box to update the Invite Subscriber settings.
Once you have subscribers ready, you may start sending messages to your subscribers. To send Messenger notifications:
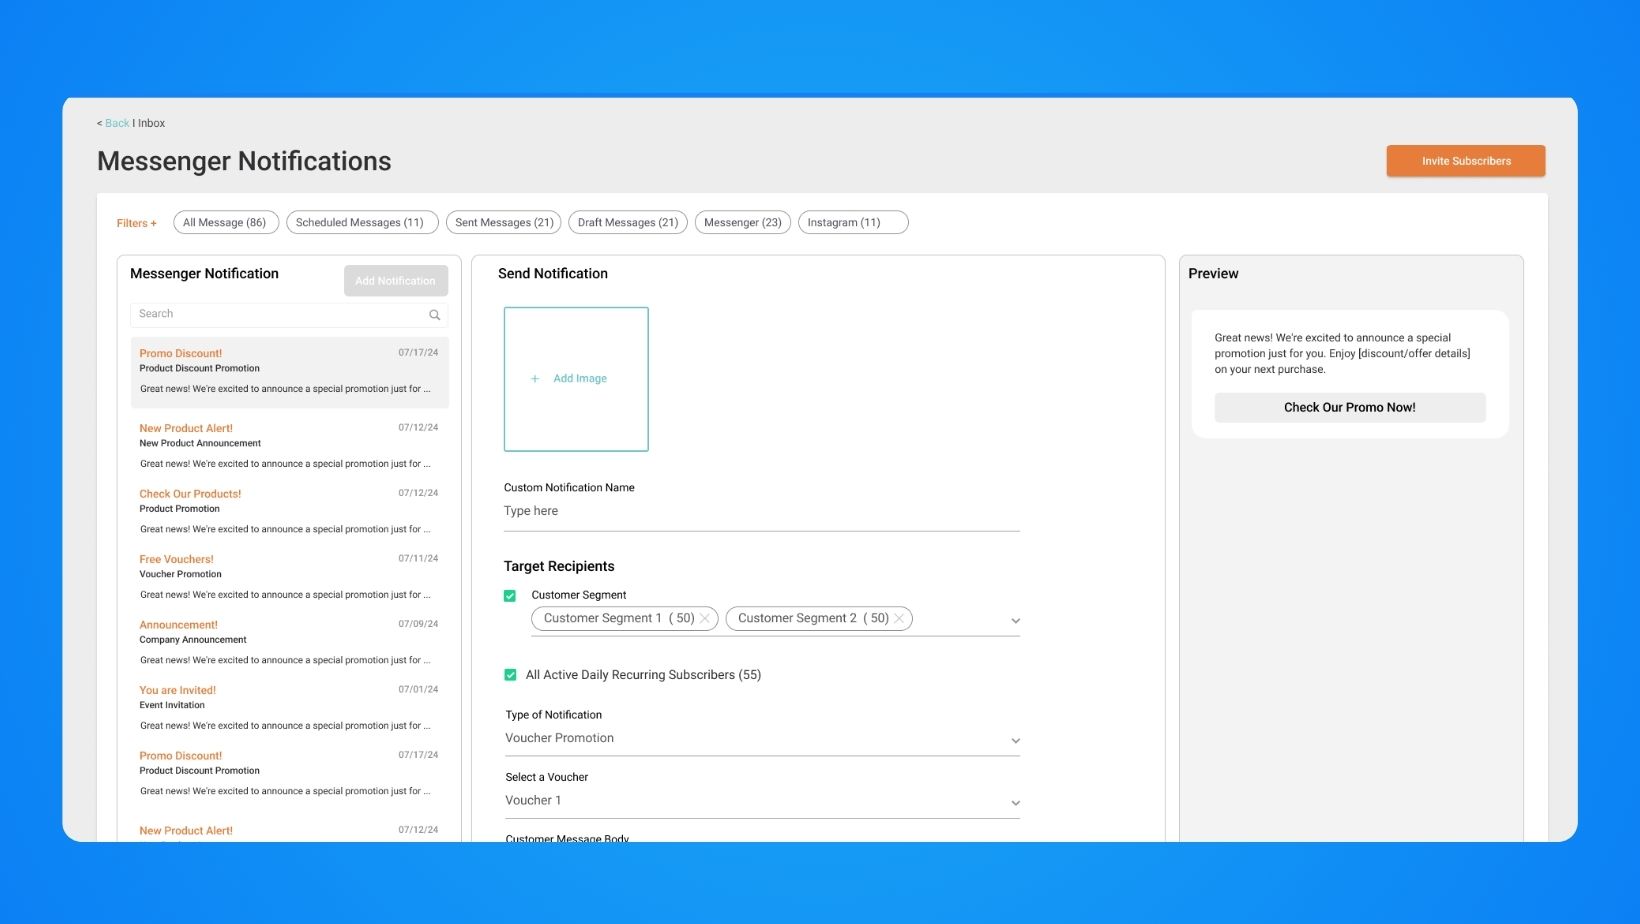
1. In the Message Inbox page, click on the Send Broadcast Message button
2. Click on the Add Notification button.
.jpeg)
3. Add an image for your notification. A landscape image is preferred.

4. Add a Custom Notification name for this notification.
5. By default, the All Active Daily Recurring Subscribers is selected here. If not, make sure to select this. You’ll also be able to see the number of subscribers you have.
6. Select the type of notification you’ll send. The options are: New product Announcement, Product Discount Promotion, and Product Promotion.
7. Select the product you want your customers to see in the notification. You can only choose one.
8. Add a custom message for the notification with a maximum of 80 caharacters.
9. Add a Call to Action Button.
10. Choose Send Now or have it Scheduled on a later date.
11. Click the Save and Send button.
Start building your subscriber lists. Get ready to take your Messenger marketing to the next level! Start engaging your customers today with ChatGenie’s Messenger Opt-In!


.png)


